Wednesday, November 25, 2009

Cucumber Onion Dip - Taste of Home

This is from one of my all-time favorite web sites, Taste of Home


Cucumber Onion Dip

 Cucumber Onion Dip
“Family members request this fast and flavorful dip often,” Judith Priglmeier assures from Aitkin, Minnesota. “We especially like it with baked potato chips, but it tastes great with any type of chip or cracker.”
12 ServingsPrep/Total Time: 15 min.

Ingredients

  • 1 package (8 ounces) cream cheese, softened
  • 1/2 cup finely chopped seeded peeled cucumber
  • 1/4 cup finely chopped onion
  • 2 tablespoons mayonnaise
  • 1/8 teaspoon salt
  • 1/8 teaspoon pepper
  • Rye chips or crackers

  • In a small bowl, beat the cream cheese, cucumber, onion, mayonnaise,
  • salt and pepper until blended. Refrigerate until serving. Serve with
  • rye chips or crackers. Yield: 1-1/2 cups.
Nutrition Facts: 2 tablespoons dip (prepared with reduced-fat cream cheese and fat-free mayonnaise; calculated without crackers) equals 50 calories, 4 g fat (3 g saturated fat), 14 mg cholesterol, 125 mg sodium, 1 g carbohydrate, trace fiber, 2 g protein. Diabetic Exchange: 1 fat.

Sunday, November 22, 2009

Cosmopolitans & Nibbles

Cosmopolitans & Nibbles
I never thought that Cosmopolitans were a serious cocktail. How I scoffed at those yuppies and dot-com kids sipping their pink drinks, while I enjoyed an icy cold martini (gin only, please!) with the smug satisfaction that I was 'hard core' and they were not.
Then I noticed that one of my food heroes, Arthur Schwartz, printed a rather good argument for their existence and a recipe for the drink on his web site. After some sleuthing, my friend Clifford forwarded me a recipe that I fussed around with to create the perfect Cosmo.
Okay. Snobs may feel that you should use Grand Marnier or Cointreau, but it's not right. Perhaps because I use fresh lime juice instead of the often-used sweet Rose's Lime Juice, but the syrupy sweetness of Triple Sec pairs perfectly with the tart lime and cranberry juice. If you do choose to use Grand Marnier, you should add about 1/4-1/2 teaspoon superfine or Baker's sugar.

Cosmopolitans
For 2 cocktails
4 shots vodka
2 shots Triple Sec
juice of 1/2 lime
cranberry juice, just enough to give a pink color
Fill a shaker with ice, add the above ingredients and shake vigorously. Strain into well-chilled martini glasses.

Of course, cocktails should always be served with little nibbles. Here are two of my favorites:

Middle Eastern Spiced Olives
Take 1/2 pound mixed olives. Toss in 1 tablespoon of harissa (Middle Eastern red chili paste). Remove the pulp from one preserved lemon, and cut into small dice. Toss with the olives. (You did make preserved lemons a few months ago when I gave you the recipe, didn't you? If not substitute three 1/2-inch strips fresh lemon or orange zest).
Harissa can be purchased in tubes in middle eastern markets or is easily made at home.

Roasted Nuts with Rosemary
(from The Union Square Café in New York City)
Roast 3 cups of mixed raw, unsalted nuts (almonds, pecans, cashews, hazelnuts, brazil nuts all work well) in a 350 degree oven for about 12 minutes, until golden brown. Transfer the hot nuts to a bowl, and toss in 3 tablespoons fresh rosemary leaves, very coarsely chopped, 1 teaspoon cayenne pepper, 1 tablespoon melted butter, and 1 tablespoon kosher salt.

Lemon Frozen Yogurt with Blueberry Swirl


Lemon Frozen Yogurt
4 cups strained yogurt (Greek-style yogurt)
1 lemon, zest and juice
1/3 cup sugar

Blueberry Syrup
3/4 cup blueberries (fresh or frozen)
1/4 water
2 Tablespoons sugar
dash cinnamon
In a small bowl, add the lemon zest, juice, and sugar. Stir until sugar dissolves and a light syrup forms. Stir syrup into the yogurt. At this point, you had a wonderfully flavored lemon yogurt. Add the mix to an ice-cream maker and freeze according to the manufacturer directions. It took about 25 minutes for it to reach a soft-serve consistency.
While the yogurt is in the ice-cream maker, add the blueberries, sugar, cinnamon and water to a small saucepan. Simmer for 10-15 minutes or until blueberries pop and the mix reduces to a semi-thick syrup. Remove from heat and allow to cool.
I’m not a pro when it comes to swirling things together. I added the frozen yogurt and blueberry sauce in alternating layers to a glass bowl. Then, I gave one or two stirs with a spoon to swirl them together. Place into the freezer and allow to firm up.
It will eventually freeze quite firm (i.e. difficult to scoop). Allow to set out for a few minutes before serving. On another attempt, I might consider adding a bit of limoncello which may deepen the lemon flavor and preclude it from freezing solid.
Scooping Frozen Yogurt

Recipe Girl's Pumpkin Snickerdoodles

Mmmmmm........so good.  I love her web site - you will too - please check her site out.

Pumpkin Snickerdoodles

Pumpkin Snickerdoodles


COOKIES:
2 sticks butter (1 cup), at room temperature
1 1/2 cups granulated sugar
3/4 cup pure pumpkin puree
1 large egg
2 tsp pure vanilla extract
3 3/4 cups all-purpose flour
1 1/2 tsp baking powder
1/2 tsp salt
1/2 tsp ground cinnamon

ROLLING SUGAR:
1/2 cup granulated sugar
1 tsp ground cinnamon
1/2 tsp ground ginger
1/2 tsp allspice
1. In a large bowl, cream butter with an electric mixer until fluffy. Add sugar and pumpkin puree and beat well. Mix in egg and vanilla, scraping down sides of the bowl to incorporate all of the ingredients.
2. In a medium bowl, whisk together flour, baking powder, salt and ground cinnamon. Beat flour mixture into liquid mixture a little at a time until incorporated.
3. Cover dough with plastic and chill at least an hour, or until dough becomes slightly firm.
4. When ready to bake, preheat oven to 350°F. Line baking sheets with parchment paper (or spray with nonstick spray). Mix rolling sugar in a small bowl.
5. Remove cookie dough from refrigerator. Use a medium cookie scoop (1 1/2 Tbsp.) or a large spoon to scoop out dough and roll into balls. Use your hands to roll the balls in the cinnamon sugar and make sure they’re coated really well. Place 2 inches apart on the prepared baking sheets.  Use a glass with a nice, flat bottom to dip in sugar and flatten the balls.
6. Bake at 350°F. for 10 to 14 minutes, or until they are slightly firm to the touch. Let cool on baking sheets for 5 minutes or so, then remove them to a wire rack to cool completely.
Yield: About 3 dozen
Cooking Tips
*Store in an airtight container. These cookies freeze well too. Place them in freezer zip bag and remove from freezer when the craving hits.
Source: Adapted from dlynz.com
PRINT THIS RECIPE using your browser’s ‘print’ function. It’s automatically formatted to print recipe & picture only.
RATE THIS RECIPE1 Star2 Stars3 Stars4 Stars5 Stars (2 votes, average: 2.50 out of 5)

Read more: http://www.recipegirl.com/2007/11/05/pumpkin-snickerdoodles/#ixzz0Xb3VP4Bz

Oven Baked Sweet Potato Fries

Oven Baked Sweet Potato Fries


Biz of Biggest Diabetic Loser has perfected the Best Oven Fries Ever (the picture is proof enough)!! I decided to throw caution to the wind and use the same technique, but for sweet potatoes instead.

My version was:

2 large sweet potatoes, peeled and cut into 1/4" to 1/2" slices
~5 Tbsp vegetable oil
salt
pepper
onion powder
garlic powder

Preheat your oven to 475°. Then, peel and slice your sweet potatoes. Mine were very large so I cut the potatoes in half and then made strips. Be very careful cutting sweet potatoes! They're pretty resistant to a knife, so you have to use a little more muscle - you don't want that slipping and coming down on a finger!


Once the potatoes are sliced, soak them in water for about 10 minutes. I think this is key in successful oven fries because it'll help with getting them fully cooked in the beginning, leaving time for better browning in the end.


Prepare the baking pan by coating the bottom with about 4 Tbsp of the oil, salt, pepper, garlic and onion powders. Pat the potatoes dry (I didn't, but I'm lazy!!) and toss with about 1 Tbsp of the oil. Lay the potato slices evenly on the baking pan.

Place the pan on the bottom rack of your oven, covered in foil, for 5 minutes. Again, this is key to the overall success. By being in the bottom of your oven, it is very close to the heating element, and by covering for the first five minutes you cook the potatoes through and can then start on the browning.

Remove the foil and then continue baking for 30 minutes. Every ten minutes remove the pan from the oven, flip the fries and then place it back in for another 10 minute round.

Mine were looking great until maybe the last 4 or 5 minutes, when I smelled that they were getting a little too dark. I think maybe because of their higher sugar content, they were more susceptible to burning. We happen to like the darker bits, but admittably some were a little charred.

I think this method would work perfectly for regular potatoes, but if using it to cook sweet potatoes keep a close watch on it the last 5 minutes! It happens fast and you'll want to catch them before they get black!

Overall, VERY delicious and easy to pop back into the oven and warm up leftovers. I dunked mine in ketchup, just as you would a "normal" fry. I look forward to cooking them with different spice experimenting in the future!

Honey Almond Biscotti

Healthified Honey-Almond Biscotti

Honey almond biscotti
makes 2 logs of ~20 pieces of biscotti cookies
1 1/4 cups all-purpose or whole wheat flour
1/3 cup granulated sugar
1/4 teaspoon baking powder
1/4 teaspoon baking soda
1/2 teaspoon ground cinnamon (I like to double to 1 tsp)
1 large egg + 1 egg white
1/2 tablespoon finely grated lemon zest
1 tablespoons honey
1/2 cup crushed almonds
powdered sugar, for rolling
Part I:
1. Preheat the oven to 350°F and line a cookie sheet with parment paper
2. In a large mixing bowl, combine the flour, sugar, baking powder, baking soda, and cinnamon.
3. In a separate bowl, whisk eggs, lemon zest, and honey together. Add to flour mixture with the almonds. Stir till stiff dough forms. (as seen below. I didn’t add any more liquid to it after the picture was taken.)
Biscotti mix
4. Scrape the dough onto a lightly sugared work surface and divide it into 2 chunks. Shape and roll each piece with the palms of your hands into a log slightly shorter than the length of your cookie sheet.
5. Place logs  several inches apart (the logs will double in width) on cookie sheet.
logs of biscotti
Bake for 15 minutes, until the logs feel set or firm to the touch. Set the cookie sheets on racks and let cool. Reset the oven to 300°F.
Part II:
6. When cool to the touch, place the logs on a cutting board. With a serrated knife, slice them into 1/2-inch pieces. (Check out the texture inside the biscotti!)
Sliced honey almond biscotti
7. Lay the biscotti out on the prepared cookie sheets in a single layer and bake for an additional 10 to 15 minutes, until they are dry and lightly toasted. Cool completely. Store in an airtight tin or plastic container at room temperature for up to 2 weeks.
Flavor & Texture: The flavors are complex. Before biting, you smell the fragrant lemon zest with a light touch of cinnamon. The crust crumbles gently in your mouth while the center of the biscotti is moist and crunchy from the almonds. Each bite is filled with the sweet combination of lemon, honey, almond, and cinnamon. Absolutely addictive.
Overall Review: This recipe is so worth the effort!!!! It’s oil/grease free, full of good fiber, nut protein, and a zesty, fresh flavor!

Saturday, November 21, 2009

Pioneer Woman's P-P-Perfect Pie Crust

This is one of my favorite sites and her step by step photos are wonderful!

http://thepioneerwoman.com/cooking/2007/12/p-p-p-pie_crust_and_its_p-p-p-perfect/

Coconut Frozen Yogurt with Tropical Fruit

Coconut Frozen Yogurt with Tropical Fruit

by SteamyKitchen on September 21, 2007 · 22 comments


Co-Co Fro-Yo, Baby

Recipe is adapted from Perfect Scoop <–which by the way is written by fellow food blogger David. If you’ve never visited his website before..then…. STOP. Collaborate and Listen. Go visit D’s blog for a brand new sensation… Ice Ice Fro-Yo Baby. Fro-Yo Baby…. sorry. I couldn’t help it. I’m still stuck on the 80’s thing….

Coconut Frozen Yogurt with Tropical Fruit

6 cups of low-fat/whole plain flavored yogurt to yield 3 cups, strained (see below) or 3 cups Greek-style yogurt
3/4 cup sugar
1 tsp coconut extract
1/2 cup sweetened coconut flakes
mixed tropical fruit (mango, kiwi, papaya, etc.)
Ice cream maker (remember to freeze your insert if you have one)
1. Strain the yogurt: If you are using regular yogurt, you’ll need to strain out the water. Line your mesh strainer with a double-layer of cheesecloth. Spoon the yogurt in, and let it sit propped over a deep bowl in the refrigerator for at least four hours. Discard the water. If you are using Greek-style yogurt (like Fage — found at Whole Foods), you don’t need to strain.
2. Mix and rest: Mix the strained yogurt with the sugar and coconut extract. Let it chill in the refrigerator for one hour to let the sugar dissolve.
3. Churn, baby, churn: Following instructions that came with your ice cream maker, churn until the mixture is the consistency of soft ice cream. 4. Toast coconut and dice fruit: While the fro-yo is churning, toast coconut. Take a dry skillet. Set on medium heat and add the coconut flakes. Stir constantly until flakes toast to a golden brown. Remove from heat immediately, and set aside. To serve, sprinkle the toasted coconut and spoon the diced tropical fruit on top of your frozen concoction.


Rolo Pretzel Turtles | Jaden's Steamy Kitchen
November 6, 2007 at 1:02 pm
grayartist February 13, 2009 at 7:39 pm
I just tried this recipe, but screwed up and got the yogurt with gelatin in it. After wondering why none of the water was separating, I did some research and found that the yogurt with gelatin won’t separate. I didn’t want to waste the yogurt I bought, so I tried it anyway, and it turned out fine! I ended up using about 4c of yogurt. I’m not sure if it is the same as yours, I substituted 1/4c Splenda instead of the sugar, and used non-fat yogurt. It froze quickly, is think and creamy, and best of all, low cal! Thanks for the idea!
annie bananie June 7, 2009 at 3:23 am
I opted for the high fat version: I used cream of coconut that I had left over from Pina Colada Night and mixed it with some condensed milk and greek yogurt. Oh, the creamyness and ate the whole think while watching Housewives of New Joysee! fantastic! yum- cream of coco AND sweet cond milk – so divine! ~j

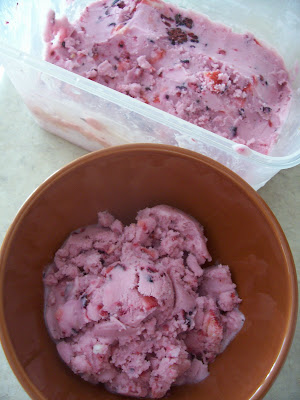
Very Berry Fro Yo

Very Berry Fro Yo

It's sweet and tart, healthy and satisfying, and full of berries! The original recipe was in the recipe book that came with an ice cream maker,  changed it a bit to make it healthier. Enjoy!

Very Berry Fro Yo

1/2 c skim milk
1/4 c. sugar
5 c. fat free vanilla yogurt
1 c. frozen mixed berries
1 c. finely diced strawberries
1 tsp. almond extract

Whisk milk and sugar in a mixing bowl for a minute. Add the remaining ingredients, stir well. Add to ice cream maker and churn for 25 minutes. I like to eat it as is, a bit soft. Keep in the freezer for 2 hours to harden.

Frozen Vanilla Yogurt


Time: 25 minutes, plus 2 hours to freeze. The quality of yogurt really matters here; look for brands without unnecessary additives (Straus Family Creamery is our favorite). We prefer a fairly tangy yogurt, so add more sugar if you want yours sweeter. Like most frozen desserts, this fro-yo tastes best when fresh.

Yield: Makes about 4 3/4 cups; 9 servings

Ingredients

  • 32  ounces  (about 4 cups) plain nonfat yogurt
  • About 3/4 cup sugar
  • 1 tsp vanilla

Preparation

1. In a medium bowl, whisk together yogurt and sugar until sugar dissolves. Taste and add more sugar if you like.
2. Spoon mixture into an ice cream maker and freeze according to manufacturer's directions. Transfer yogurt to a container and freeze until firm, about 2 hours.
Make ahead: Freeze up to 1 week. Let soften at room temperature about 45 minutes before scooping, or microwave a few seconds until softened.
Note: Nutritional analysis is per 1/2-cup serving.

Nutritional Information

Calories:
121 (1% from fat)
Protein:
5.8g
Fat:
0.2g (sat 0.2)
Carbohydrate:
24g
Fiber:
0.0g
Sodium:
77mg
Cholesterol:
2mg
Sunset, JUNE 2009

Tart'n' tangy fro-yo
MAKES About 4 3/4 cups; 9 servings TIME 25 minutes, plus 2 hours to freeze
32 oz. (about 4 cups) plain nonfat yogurt
About 3/4 cup sugar

1. In a medium bowl, whisk together yogurt and sugar until sugar
dissolves. Taste and add more sugar if you like.

2. Spoon mixture into an ice cream maker and freeze according to
manufacturer's directions. Transfer yogurt to a container and freeze
until firm, about 2 hours.

Make ahead: Freeze up to 1 week. Let soften at room temperature about
45 minutes before scooping, or microwave a few seconds until softened.

PER 1/2-CUP SERVING 121 CAL., 1% (1.8 CAL.) FROM FAT; 5.8 G PROTEIN;
0.2 G FAT (0.2 G SAT.); 24 G CARBO (0 G FIBER); 77 MG SODIUM; 2 MG CHOL.
START RIGHT The quality of yogurt really matters here; look for brands without unnecessary additives (Straus Family Creamery is our favorite).
SWEETEN TO TASTE We prefer a fairly tangy yogurt, so add more sugar if you want yours sweeter. Like most frozen desserts, this fro-yo tastes best when fresh.
[ILLUSTRATION OMITTED]
[ILLUSTRATION OMITTED]
Variation: Luscious lemon fro-yo
Just as refreshing as our Tart 'n' Tangy Fro-Yo, but with the bright taste of lemon. To make it, substitute 2/3 cup lemon curd for the sugar in step 1 of our Tart 'n' Tangy Fro-Yo recipe (see page 98). The mixture will take longer to freeze until firm, however--about 3 1/2 hours.

Sunday, November 8, 2009

Blueberries Bryan - For Brunch

“What’s brunch?”
“You’d love it.  It’s not quite breakfast, it’s not quite lunch, but it comes with a slice of cantaloupe at the end.  You don’t get completely what you would at breakfast, but you get a good meal.”
– The Simpsons
Blueberries Bryan
Blueberries Bryan

French bread, cut into 3/4-inch slices
8 eggs
1 cup milk
3/4 teaspoon vanilla extract
1/2 cup (1 stick) butter, softened
1 cup packed brown sugar
1/4 cup flour
1 cup rolled oats
1 cup chopped walnuts
1 to 2 cups fresh blueberries

Place the bread slices in a greased 6 x 10-inch baking dish. Cut extra bread to fill in any open spaces on the bottom. Beat the eggs in a bowl. Stir in the milk and vanilla. Pour over the bread slices. Let stand for 1 to 2 minutes for the bread to soak up the liquid. Turn the bread slices over to evenly soak the other side.
Combine the butter, brown sugar and flour in a bowl. Mix with a pastry blender. Stir in the oats. Sprinkle over the soaked bread. Top evenly with walnuts and blueberries.


blueberries bryan unbaked

Bake at 375 degrees for 30 to 40 minutes or until puffed and the edges are bubbling. Cool on a wire rack for 5 minutes. Cut into squares to serve.

Yield: 8 servings

This diabolical brunch plot is sheer elegance in its utter simplicity.  Take baked French toast, combine it with a fruit crisp topping, and add fresh fruit.  It is quick and easy, and the result is mind-bogglingly delicious.  Additionally, the blueberries and rolled oats give all the dish an air of healthy wholesomeness, of which it is clearly undeserving.

Austin Banana Bread

This is a different twist on banana bread, more "southern".

1 cup butter
1 ½ cups sugar
2 eggs
4 ripe bananas, mashed
1 tsp vanilla extract
4 TBSP buttermilk (or milk with vinegar added)
2 cups flour
1 ½ tsp baking soda
1 tsp salt

TOPPING
6 TBSP butter
10 TBSP Brown sugar
5 TBSP Milk
Chopped Pecans, optional

Preheat oven to 350°.

Cream butter and sugar. Beat eggs and add to sugar mixture. Add bananas, vanilla and buttermilk.
Sift together flour, soda and salt. Add to banana mixture. Beat well.
Pour into 2 greased and floured 9 by 5 by 3-inch loaf pans.
Bake 45 to 50 minutes or until bread pulls away from sides of pan. Cool.
To prepare topping, melt butter in saucepan. Add sugar and milk. Cook until syrupy.
Remove from heat and add chopped pecans.
Pour over bread and place under broiler 5 minutes.

Frank's Famous Sausage Gravy with biscuits

I personally would never eat this but I have a brother who loves this "heart attack on a plate" type of breakfast.  I have no idea who Frank is, but this is his recipe.


1 lb Pork  Sausage ground
1 can (12 oz) Evaporated milk or 1 cup milk
1 cup flour
1 TBSP  Freshly ground black pepper
1 tsp. salt- to taste
hot sauce, optional

Part of the secret of good sausage gravy is the FAT. Sorry folks, but the lean “good for you” kind of pork sausage just won’t make good sausage gravy. If you are worried about the fat and cholesterol . . . eat something else!! Select a good brand but any brand with a good balance of meat and fat will do. If you have a good meat market in your area where they grind their own sausage, tell the butcher to grind you some with plenty of fat left in.

Pre-measure your milk and flour and have it ready next to the stove, as well as about a liter of water. Heat a deep skillet to medium high heat. Fry up the sausage with about half a teaspoon of hot sauce, until it is well browned and has rendered all of the fat. Break up the sausage into small bit as it fries, so that it is the size of small peas. Lower the heat just a bit, then add the flour to the pan. Mix into the sausage until the flour is totally coated with the rendered grease. You should not be able to see any more bright white flour. If there is not enough grease to coat all of the flour, add vegetable oil or lard until there is. 

You should now have little brownish sausage/flour nodules. Add salt, to taste, and the black pepper. Add the milk and about a cup of water. Stir with a wooden spoon, breaking up the nodules that have formed. Keep stirring and breaking up the nodules until it begins to smooth out. It will get very thick; add water until you get a nice, smooth, creamy consistency. The only lumps in the gravy should be the sausage! If the flour was well coated with grease, it will not be lumpy. Keep heating and stirring until it stops getting thicker and you have the consistency you want.

I prefer to use the “mild” sausage and decide for myself the type and kind of spice to add. Although it’s hard to make something too hot and spicy for me, my family does not share my taste for hot food, so I have to tone my cooking down for normal humans. Plus, the hot kind just doesn’t make good gravy . . . it’s good for sausage patties or biscuit sandwiches, but not for gravy.

  Frank's Famous Baking Powder Biscuits

There's no reason to settle for those substandard biscuits you find in the dairy case. This recipe is SO easy and quick, once you get the hang of it, that there's no reason not to make them from scratch. After a while, if you make them often enough, you will get to the point where you don't have to measure the ingredients . . . you can tell from the "feel" of the dough when you have it right. Don't worry though . . . just stick to the amounts below and you'll do fine! I have tried it with prepared baking mixes also . . . "Bisquick" is my personal favorite, and I can't really tell the difference. Except the price, of course! It's MUCH cheaper to mix it up from scratch. 

2 cups flour
2 1/2 teaspoons baking powder
1/2 teaspoon salt
1/3 cup Crisco
2/3 cup milk 

Preheat the oven to 425°F. 

Mix all the dry ingredients together in a bowl. 

With a pastry blender, or two knives cut the shortening into the dry mixture until it has the consistency of coarse cornmeal. (I've seen this done with two butter knives, but personally, I'd be lost without a pastry blender!) Add the milk while gently stirring with a fork. The dough that forms should be soft, but not sticky. You may have to add a little more or less depending on the temperature and humidity of your kitchen. You'll have to experiment until you learn the "feel" of the dough. Knead the dough on a floured board until smooth. DO NOT OVERWORK! Overworked biscuits will be tough! A friend of mine once said "Just flip it over and smack it twice . . . .don't work it no more!" Roll out the dough, or pat it flat. Cut with a biscuit cutter or a glass tumbler and place on a lightly greased baking sheet about 1 inch apart. This recipe makes about a dozen biscuits about 3 inches across and a half inch tall (unbaked). You can make them thicker, of course, but remember that they will rise up as they bake. Bake 12-15 minutes, or until golden brown.

Easy Roast Beef

4 pound chuck or shoulder beef  roast
3/4 cup flour (more or less)
salt and pepper to taste
garlic powder to taste (optional)
8 TBSP  butter 
1 cup water or beef bouillon 

Dredge a 4 pound chuck or shoulder beef roast with a mixture of flour, salt and pepper. Place 3 or 4 Tablespoons of butter in bottom of roaster pan. Put meat in pan and put 3 or 4 patties of butter on top of meat. Bake at 350 degrees F for one hour, uncovered. Add 1 cup of water, cover and bake for 2 more hours at 250 degrees F.

When you add the water (or bouillon) you can also add onions, carrots and potatoes and have a complete meal.

This extremely easy and delicious recipe works equally well with other inexpensive cuts of beef like the Eye of Round Roast, Bottom Round or Rump Roast (pictured), and the Top or Inside Round Roast. For even richer and more savory pan juices, and eventually gravy, try substituting Beef Broth or Beef Consomme for the water. To make a complete meal, when you add the water, also add your favorite vegetables (onions, potatoes, carrots, celery, mushrooms, etc.) and once cooked, simply thicken the pan juices and your meal is finished.

Carmelized Onion Burgers from Southern Living

An excellent grilled burger from the Southern Living - Makes 4 burgers


4 medium onions sliced
2 teaspoons sugar
2 tablespoons olive oil
1/4 cup water
1 tablespoon balsamic vinegar
3/4 teaspoon salt, divided
1 lb ground beef
1/4 cup chopped parsley
2 tablespoons tomato paste
2 teaspoons Worcestershire sauce
1/4 teaspoon freshly ground pepper
4 hamburger buns, toasted
4 slices tomato
Leaf lettuce

Cook onions and sugar in hot oil over low heat 20 to 25 minutes until onion is caramelized, stirring often. Stir in the 1/4 cup water, vinegar, and 1/4 teaspoon of the salt. Set aside and keep warm.

Combine beef, parsley, tomato paste, Worcestershire sauce, 1/2 teaspoon salt, and pepper. Shape into 4 patties.

Grill over medium-hot heat until beef is no longer pink.
Serve on buns with caramelized onions, tomato slices and lettuce.

Spiced Cranberry Apple Cider for Adults

This is a fabulous adult drink for cold weather. Spiced rum is a great alternative to the dark rum.


12 whole cloves
6 whole allspice berries
3 cinnamon sticks
1 tablespoon orange zest
8 cups apple cider
1 cup fresh orange juice
1 cup cranberry juice
1 cup pineapple juice
1/2 cup dark rum or spiced rum (Captain Morgan's)
1/2 cup apple brandy

Use a tea ball or a piece of cheesecloth to make a bundle of the cloves, allspice, cinnamon sticks and orange peel - put all other ingredients in a large saucepan with this and bring to a boil over high heat. Reduce heat to medium and cook for about 15 minutes or until the cider is reduced to about 4 cups. Remove and discard the cheesecloth bundle of spices. Keep warm to serve - crockpot works great

Virginia Sweet Plum Bread

2 (4 ounce) jars plum baby food
2 cups sugar
3 large eggs, beaten
1 cup vegetable oil
2 cups self-rising flour 
1 teaspoon cinnamon
1 teaspoon ground cloves
1 cup coarsely chopped nuts (optional) 
Confectioner's sugar (to garnish) 
 
Preheat oven to 350Âş.
In a large bowl, combine all ingredients except confectioner's sugar.
Pour into a greased Bundt pan.
Bake 1 hour or until a toothpick comes out clean.
After cooling, invert onto serving plate and sprinkle with confectioner's sugar.

Simple Fruit Sodas for Kids or Grown-ups

1-2 tablespoon frozen  fruit, drink concentrate (limeade, fruit punch, grape juice, etc.)
club soda
crushed  ice

I just place 1-2 tbls of the frozen concentrate., depending on size of glass and taste, in a glass. Add club soda till almost full. Stir to mix and add some ice. Instant soda! Use the amount that you like. I like mine a little strong so usually use about 2 tbls. to a 16 oz. glass. Enjoy! It couldn't get much easier than this and you can make just as much as you want at a time.

Apple Grand Marnier Sauce for Pancakes, Waffles, or French Toast


Serves  8 -10  
2 cups Maple Syrup 
1/4 cup Grand Marnier 
2 medium apples, peeled, cored, and thinly sliced
    Using a medium saucepan, bring all ingredients to a slow simmer.Simmer for 5 minutes or until apples are tender. Serve warm over French toast, waffles or pancakes.


    Corn on the Cob in the Microwave

    It's too late for this season but I'll be sure to try it next season as my friend claims this is the ULTIMATE way to prepare corn on the cob.


    Don't EVER  boil corn again!!!!  Save the nutrients, flavor and time.


    Toss corn, husks, silks & all, into the microwave, 3 min. per ear on high. 
    Let sit for a couple of minutes.  Handle carefully with a couple of kitchen mitts.  


    Stand next to trash can, peel off husks and silks in one sweep each side.  
    Butter and enjoy!  


    You will be amazed at the difference!

    Chicken Cigars


    1 12oz. boneless skinless chicken breast cut into 1in. cubes
    1/2 med red onion roughly chopped
    2 cloves garlic
    1 small carrot peeled and roughly chopped
    1 med. celery stalk roughly chopped
    1/3 cup Italian parsley chopped
    3/4 tsp dried oregano
    3/4 tsp dried basil
    3/4 tsp kosher salt
    1/2 tsp red pepper flakes
    1 tbs white wine
    black pepper to taste

    8 sheets Athens phyllo dough (thawed)
    Olive oil spray
    Pesto sauce


    Preheat oven to 350 degrees F

    Place all ingredients except the phyllo dough sheets in a food processor. Pulse until all ingredients are combined and semi smooth. On a non stick baking sheet place one Athens Phyllo sheet, spray with olive oil and fold length wise. Spray folded sheet once more with olive oil. Evenly spoon 2 tbs of filling at one end of the sheet. Fold over the sides 1/2 in. and roll into cigar shape. Place on non stick baking sheet. Repeat to make a total of 8 chicken and phyllo roll-ups.
    Place into the oven and bake for 30 minutes or until golden brown.
    Let cigars cool cut in to 4 pieces per roll and dip in your favorite pesto sauce.

    Michael's Best Button Mushrooms- Michael Chiarello

    Serves: 4 Servings

    6 tablespoons extra-virgin olive oil
    1 1/2 pounds whole small button mushrooms, wiped clean
    3 tablespoons butter
    Gray sea salt ( you can buy it from Michael's site, NapaStyle)
    1 tablespoon minced garlic
    1 1/2 teaspoons fresh thyme leaves, chopped
    2 tablespoons lemon juice
    1/2 cup white wine
    1 tablespoon chopped parsley leaves
    In a large skillet, heat the oil over high heat. Add the mushrooms. Do not move the mushrooms until they have caramelized on the bottom. If you toss them too soon, they will release their liquid and begin to steam. When the bottoms are caramelized, toss them and continue to cook for about 5 minutes.

    Add the butter. Cook and toss for 5 minutes, until beautifully browned.

    Season with salt and add the garlic. Saute another 2 minutes, and add the thyme, lemon juice, and white wine. Cook to evaporate the liquid.

    Toss in the parsley and serve immediately.

    Cauliflower alla Parmigiana - Michael Chiarello

    This recipe is from his web site - make sure to visit it and sign up for his mailing list -NapaStyle


    From Michael Chiarello's Casual Cooking Cookbook

      Italians prefer to cook it with butter and Parmesan until it's richly browned and caramelized from its natural sweetness. This is the alla parmigiana method, and cauliflower is only one of many vegetables prepared this way. You can use the same technique on asparagus, broccoli, fennel, zucchini, Swiss chard stems, or artichokes.

    Serves: Serves 4

    Unsalted butter for the baking dish,
    plus 2 1/2 tablespoons
    1 cauliflower, about 1 1/2 pounds,
    separated into large florets
    Sea salt, preferably gray salt
    Freshly ground black pepper
    1/3 cup freshly grated Parmesan cheese
     
    Preheat the oven to 425ýF. Butter an 8-by-10-inch oval baking dish, or a dish of equivalent size. Bring a large pot of generously salted water to a boil. Add the florets and boil until they are slightly softened but still retain some crispness, about 4 minutes. Drain well, then slice them lengthwise so the stems are about 1/4 inch thick.

    Arrange the slices, overlapping them tightly, in the prepared baking dish. Season with salt and several grinds of black pepper, then dot with thin slices of butter, using 2 1/2 tablespoons. Sprinkle with the cheese.
    Bake uncovered until lightly browned on top, about 30 minutes. Serve hot

    Breakfast Spinach Tarragon Quiche Phyllo Cups


    6 sheets phyllo dough, thawed
    6 eggs, organic
    6 tablespoons water
    12 ounces spinach, drained well
    1/2 cup shredded white cheddar cheese (or any shredded cheese you like)
    2 tablespoons all purpose white whole wheat flour
    1 tablespoon dried tarragon
    Salt and pepper to taste
    spray organic olive oil

    Preheat oven to 425 degrees. In a bowl, mix together eggs, water, spinach, cheese, flour, tarragon, and salt and pepper until well blended.

    Open Phyllo dough and on a dry surface, open the inner package and lay the dough sheets out flat. Remove six sheets and place under a slightly damp, clean kitchen towel. Place the remainder back into the package as it was removed and place back in freezer. Remove the kitchen towel and cut the Phyllo dough into approximately six even squares. They won’t be exactly even, but that’s fine for this recipe.

    In a large muffin pan (at least 6 muffin openings), place the fillo dough squares into each of the muffin cups so some of the dough extends past the rim of the muffin cup. Repeat for remaining five cups. Spray the fillo cups with a light spray of the olive oil. Equally divide quiche mixture into each of the fillo cups taking care not to overfill. Bake in a 425 degree oven for approximately 10 to 12 minutes or until fillo is slightly brown and quiche is firm to the touch. Ovens vary in temperature so pay attention. Carefully remove from muffin tins and allow to slightly cool. Best served warm.

    Serving
    Serves 5-6

    Baked Brie


    1 Phyllo dough Sheet
    1/4 cup of brown sugar
    1/4 cup chopped walnuts
    1 lb. Brie cheese round
    1 egg


    Let Phyllo dough come to room tempurature. Preheat oven to 400 degrees. Roll dough out into a square. Place cheese round in the middle of the dough and add nuts and brown sugar to the top. Brush 4 corners with the egg. Bring the 4 corners together to the center. Brush top with egg mixture. Bake for 20 minutes. Serve with water crackers.

    Baked Apple Cannoli with Vanilla Cream Sauce

    Baked Apple Cannoli:


    2 Golden Delicious apples
    1 Granny Smith apple
    1 Fuji apple
    2 Tbsp. lemon juice
    ½ cup light brown sugar
    2 tsp. cinnamon
    ½ tsp. salt
    6 Tbsp. butter
    20 sheets Athens Phyllo Dough, thawed
    Melted butter for brushing

    Vanilla Cream Sauce:
    2 cups half and half
    2 tsp. vanilla
    ½ cup sugar
    ½ cup light brown sugar
    4 Tbsp. butter

    Instructions
    Peel, core, and dice the apples. In a large bowl, combine the lemon juice, brown sugar, cinnamon, and salt. Add the apples and toss to coat. In a large skillet over medium-high heat, melt the butter and add the apples. Cook approximately 10-12 minutes, stirring occasionally, until apples begin to soften. Remove from the heat and cool completely.

    Preheat oven to 350 degrees. Unroll Phyllo Dough and brush one sheet with melted butter. Top with a second sheet and brush with melted butter. Repeat until five sheets have been stacked and brushed with melted butter. Carefully cut the stack in half across the width, then cut the two halves once more. Make two evenly-spaced cuts across the length of the stack to create a 4 square by 3 square rectangle for a total of 12 squares. Top each square with one Tablespoon of the cooled apples, spreading slightly in a diagonal from corner to corner. Fold opposite corners over the apples to form a tube, pressing gently to seal the top. Repeat layering and filling process with remaining Phyllo sheets and apples. Place pastries two inches apart on ungreased cookie sheets. Bake for 12-14 minutes or until pastry is flaky and golden. Remove from sheets to cool, serve with Vanilla Cream Sauce for dipping.

    To make Vanilla Cream Sauce:
    Combine all ingredients in a medium saucepan. Bring to a boil, cook and stir for two minutes or until sauce begins to thicken. Remove from heat. Serve immediately with Baked Apple Cannoli. Refrigerate leftovers.

    Fillo product
    Fillo dough

    Serving
    Serves 7 or more

    Prep Time 30-60 minutes

    These sweet, flaky bites combine the comfort of apple pie with the convenience of a petite dessert. The decadent sauce adds a rich flavor to a pastry that will melt in your mouth!

    keywords: Phyllo Dough
    Apple

    (Truly) Decadent Chocolate “Bread” Pudding

    (Truly) Decadent Chocolate “Bread” Pudding
    For this chocolatey rich
    bread pudding we used chocolate glazed raised donuts and brownies from a leftover batch of Barefoot Contessa Outrageous Brownies, but any brownies will do! You can use day old brioche bread, but it won’t be nearly as chocolatey.

    Yield: 1 each, 9” x 13” Baking Pan
    Ingredients
    Butter ‐ for buttering the baking pan
    10 C Chocolate Glazed Raised Donuts, cubed*
    2 C chocolate brownies, cubed (optional)
    1 T Granulated Sugar
    12 Egg Yolks, large
    4 C Half & Half
    3 Tbsp Cocoa Powder, unsweetened
    6 oz Semisweet Chocolate, finely chopped
    (we used Scharffen Berger)
    1 tsp Vanilla Extract
    ¼ tsp Salt

    Place the cubed donuts and brownies in the buttered baking pan.
    Whisk the sugar and egg yolks together in a large bowl.

    Combine the half & half and cocoa powder and bring to a boil, and then
    gradually whisk this mixture into the eggs.

    Combine and stir in the chopped chocolate, vanilla and salt – keep stirring until the chocolate is melted
    and the mixture is smooth. Pour this chocolate custard over the donut/ brownie mix.


    Place parchment paper (or plastic wrap) over the pan and weight the top down to immerse the mixture.
    Let it stand for 30 – 60 minutes. Remove the weights, cover the custard with foil, and then vent holes
    through the parchment (or plastic) and foil.

    Bake in a 325oF degree conventional oven in a hot water bath for 75 – 90 minutes or until the custard is
    set and all of the liquid is absorbed.

    Cool slightly on a wire rack. Serve warm!

    * If you use brioche bread, dry it slightly on a sheet pan first in a low (200o – 300oF) oven

    Pecan (or Walnut!) Diamonds

    Great for holiday gift giving. This recipe makes about 100 1” diamonds.

    Cookie Dough

    10 T Butter
    9 T Granulated Sugar
    3 T Solid Shortening
    1 Egg
    ½ tsp. Vanilla Extract
    3 C All‐Purpose Flour
    1 tsp. Baking Powder
    ½ tsp.Salt

    Filling

    2 C Butter (1 lb)
    1 1/8 C Honey
    ½ C Sugar
    2 ½ C Light Brown Sugar
    8 C Chopped Pecsns, or Walnuts!
    ½ C Heavy Cream

    To make the dough, cream together the butter, sugar, shortening, egg and vanilla. Sift together the
    flour, baking powder, and salt. Add this to the creamed ingredients and mix to form a smooth
    dough. Divide the dough into 3 equal rectangular shaped pieces, wrap each piece individually and
    refrigerate overnight.

    Place one piece of dough between 2 pieces of plastic wrap, keeping the other 2 refrigerated. Roll it
    into a 5” x 12” rectangle and place it inside a 12” x 16” parchment paper‐lined baking sheet. Repeat
    this with the other 2 pieces of dough so that the entire base of the ½ sheet pan in covered. If the
    dough crumbles, not to worry – just press and piece it together. Prick the dough with a fork and
    bake for 10 minutes in a 350oF degree conventional oven.

    Combine the butter, honey, (2) sugars in a LARGE saucepan over a medium heat. Bring the mixture
    to a boil and boil it for exactly 3 minutes. Remove it from the heat and cool. Fold in the nuts and
    then the heavy cream. Mix well and spread immediately over the baked crust. Bake in a 350oF
    degree conventional oven for 35 minutes. Cool completely and cut into diamonds to serve.

    Important Note! Make sure you have an oven liner or foil on the bottom of your oven! The sugars
    will definitely boil over and you’ll need something to catch them or you’ll have a sugary mess

    Dipping Sauce Infused with Garlic

    ½ Cup of Extra Virgin Olive Oil
    (Masserie diSanteramo Organic Recommended!)
    4 Cloves of Garlic, Thinly Sliced
    Balsamic Vinegar
    Pinch of Salt
    Pinch of Crushed Red Pepper Flakes (optional)
    Freshly Ground Black Pepper
    Freshly Grated Romano or Parmesan Cheese
    FRESH, Crusty Italian or French Bread, Hunks … Slices … Whatever…

    Gently heat the olive oil in a small saucepan over a medium heat.
    Add the garlic and cook until just fragrant and not colored.
    Remove from the heat and allow it to cool to room temperature.
    Strain out the garlic and place the oil in a shallow bowl.
    Drizzle the balsamic vinegar decoratively into the center.
    Sprinkle the salt, red pepper flakes and grated black pepper over the oil.
    Then, top with a light coating of cheese.

    Classic Hummus and Spiced Pita Chips

    Approximately 2 ½ C

    2 each 15 oz cans of Garbanzo Beans, rinsed and drained
    1 T Fresh Garlic – minced
    1 tsp Salt
    1/8 tsp Cayenne Pepper
    1 ½ oz Fresh Lemon Juice
    2 T Tahini (Sesame Seed Paste)
    4 oz Olive Oil

    Combine all of the ingredients except for the olive oil in a food processor.
    While the motor is running, slowly drizzle in the olive oil through the opening in the top.
    Process the mixture until it is well blended and a creamy, smooth consistency is achieved.
    (if you like your hummus a bit “looser”, just add more olive oil!)
    Refigerate

    Garnish with a drizzle of olive oil and a sprinkling of paprika or some roughly chopped cilantro.

    Variation: For Roasted Garlic Hummus, simply add 6 or so cloves of mashed roasted garlic!
     
    Spiced Pita Chips

    Yield: 48 chips (8 – 10 people)

    6 T Olive Oil
    1 T Cumin, ground
    1 T Sea Salt
    2 tsp Freshly Ground Black Pepper
    ½ tsp Paprika, ground
    6 each 6” Pita Chips (white or wheat), cut into 6 even pie‐shaped wedges

    Combine all of the wet ingredients.
    Arrange the pita chips on parchment paper‐lined pans in a single layer.
    Drizzle the olive oil mixture over the chips and lightly toss.
    Bake in a 375oF oven for 10 minutes or so, or until desired level of crispness.
    One they start crisping it goes rather quickly, so check often.
    If you’re not sure, just set your timer for every minute and a half or so.

    Sunday, November 1, 2009

    Festive Fall Snack Mix


    If you are a fan of the sweet and salty combination, then this will become an instant winner! And did I mention it requires no cooking?

    1 Box of Mini Peanut Butter Sandwich Crackers
    1 Small Box of Raisins
    1 Bag of Candy Corn
    1 Bag of Plain M&M’s
    1 Jar of Lightly Salted Dry Roasted Peanuts
    Mix together in a large bowl. (The small ingredients tend to sink to the bottom, so give them a little boost to the top.) CHOW DOWN! Nom! Nom! Nom!

    I like it because it’s not a complete sugar-loaded-wasted-calorie-snack. You get a little sweet, but some protein and fiber while you’re at it!

    Simply Mahhvelous Oven BBQ Beef Sandwiches


    A Home-Reared Chef! Cook by Instinct, Recipe #18!
    A must try! Family and friends rated this dish five stars, for taste and texture.

    Prep Time:    30 min
    Cook Time:   3 hours in oven
    Level:           Easy
    Serves:         10 hearty servings
    Ingredients:
    7 (about) pounds 7-Bone chuck
    1 tablespoon peanut oil
    1 tablespoon olive oil
    1/2 cup Tawny Port
    1 can of Coca Cola
    1 bottle (2 cups) barbecue sauce (Bullseye preferred)
    1/2 cup apple cider vinegar
    1/3 cup golden-brown sugar (packed)
    1 tablespoon Gray salt
    1 and 1/2 tablespoon mustard (Grey Poupon preferred)
    2 tablespoon Worcestershire sauce
    1 teaspoon red pepper flakes
    1 teaspoon Chipotle powder
    1 teaspoon Ancho chili powder
    2 large onions, coarsely chopped
    5 cloves of garlic, crushed
    2 bay leaves
    1 sprig of thyme (or about 1/2 tablespoon dry)
    About 10 to 13 sweet rolls/French rolls


    Heat oven to 350 Âş F
    1.   Brown the meat in heated oils in a large Dutch (ovenproof) oven. When meat is nicely golden take out and set aside.
    2.   To the pot add the rest of the ingredients: port, BBQ sauce, cola, vinegar, and brown-sugar, gray salt, mustard, Worcestershire, chili powders and chili flakes, onion, garlic, bay leaves and thyme. When you see that all the ingredients are beginning to boil place the meat in pot and bring this back to a boil.

    3. Place in the oven and bake (covered) for a total of about 3 hours (after 1 and half hours turn meat and continue cooking until it is fork-tender). Take the meat out and let it rest for about 20 to 30 minutes before slicing or shredding.

    Nacho Potato Soup


    Since this soup starts with a box of au gratin potatoes, it is super easy to make.
    One package (5 1/4 ounces) au gratin potatoes
    One can (11 ounces) whole kernel corn, drained
    One can (10 ounces) diced tomatoes with green chilies, undrained
    2 cups water
    2 cupsmilk
    2 cups cubed process American cheese
    In sauce pan, combine the au gratin mix, corn, tomatoes, and water. Bring to a boil, then cover and simmer 15–20 minutes. Add milk and cheese, stir well until cheese is melted throughout. Serves 6–8

    Good Ham Bean Soup

    Good ham and bean soup can be an economical use of leftover ham or a tasty way to utilize ham hocks.
    Good Ham Bean Soup

    Time to Pick a Bone

    You can make a good ham and bean soup using just cubes of ham alone, but to get the best flavor you should use a ham bone. You can get your ham bone from the butcher, since they will often give them away or sell them very cheaply, or you can use a leftover bone from a ham that you have served for dinner.
    If you are making a ham for dinner, then any leftover ham can be used in the soup as well. In fact, the best ham and bean soup recipes use both ham bones as well as cubes of ham.

    Bean There, Done That

    If you happen to have a can of beans handy that you would like to use for your ham and bean soup, then by all means go for it. The typical bean used in ham and bean soup is the great northern bean or navy bean. Both of these beans are small, white beans and their flavor matches well with ham.
    If you are using dried beans, you will have to soak and cook them before adding them to your soup. In order to prepare your beans, you should follow these instructions:
    • Pick over the beans. Spread the beans out on a cookie sheet and check for small stones. Remove any small stones and broken or discolored beans.
    • Wash the beans. Rinse the beans under cool running water to remove any dust.
    • Soak the beans overnight. While soaking the beans is not strictly necessary, it does reduce overall cooking time. Just place the beans in a bowl and cover with cool water.
    • Quick soak method. Place the beans in a pot and cover with water. Bring to a boil for 2 minutes. Then cover tightly and remove from the heat. Let rest for one hour.
    • Discard the water. Whether you use the long or quick soak method, you should drain the soaking water from the beans before using them in your soup.
    Once the beans are prepared, you can then use them in your soup. You might be wondering if it is absolutely necessary to soak beans before using them in your soup. The answer is no, you do not. Although soaking does reduce cooking time and it does give the beans a more consistent texture. I suggest using the quick soak method because it is effective and will get your beans ready for dinner tonight. But if have the time to use the overnight soak method, you will find that the beans, once in the soup, will be fully cooked sooner.

    Good Ham Bean Soup

    • 1 pound of navy beans (or great northern beans)
    • 8 cups of vegetable or chicken stock
    • 1 ham bone or ham hock
    • 1 large carrot chopped
    • 1 small celery stalk, chopped
    • 2 garlic cloves, minced
    • 1 medium onion, chopped
    • 2 cups diced ham
    • Salt and pepper to taste
    • 2 tablespoons vegetable oil

    Instructions

    1. Prepare the beans as described above. I suggest using the quick soak method.
    2. In a stockpot or a large pot, heat the oil over a medium flame.
    3. Add the garlic, onions, carrots, and celery.
    4. Reduce the flame to medium low and slowly cook the vegetables until the onions are translucent, stirring occasionally.
    5. Add the vegetable or chicken stock and the ham bone or ham hock and the diced ham.
    6. Add the beans to the soup.
    7. Simmer for 60 minutes.
    8. Remove the ham bone.
    9. If you are using a ham hock, remove it from the soup and remove the meat from the bone. Add the meat from the bone to the soup.
    10. Taste for salt and pepper.
    11. Test the beans for doneness by tasting some of them. They should be very soft to the tooth.

    Chicken and Vegetable Chowder


    Chicken and Vegetable Chowder
    Share this RecipeShare this Recipe
    Watch the How-To Video

    INGREDIENTS
    8slices bacon, cut into pieces
    1medium onion, chopped (1/2 cup)
    2cloves garlic, finely chopped
    4cups half-and-half
    3 1/2cups Progresso® chicken broth (from 32-oz carton)
    2cups diced cooked chicken
    1 1/2cups mashed potato mix (dry)
    1bag (12 oz) Green Giant® Valley Fresh Steamers™ Niblets® frozen corn
    6 1/2cups Green Giant® SELECT® frozen broccoli florets
    1/4teaspoon dried thyme leaves

    1.In Dutch oven, cook bacon over medium heat until crisp. Remove bacon from Dutch oven; drain on paper towels.  
    2.Reserve 2 tablespoons bacon drippings in Dutch oven. Add onion and garlic; cook and stir 4 to 6 minutes or until onion is crisp-tender.
    3.Stir in bacon and remaining ingredients. Cook over medium heat 15 to 20 minutes, stirring occasionally, until thoroughly heated.

    Breakfast Quiches to GO

    All the great flavors of quiche are combined in a hand-held crescent cup.
    Prep Time:25 Min
    Total Time:45 Min
    Makes:16 quiches
     
    2cans (8 oz each) Pillsbury® refrigerated garlic butter crescent dinner rolls (8 rolls each)
    1package (8 oz) cream cheese, softened
    3Eggland's Best eggs
    1small onion, chopped (1/4 cup)
    1box (9 oz) Green Giant® frozen chopped spinach, thawed, squeezed to drain
    1/4teaspoon salt
    1/8teaspoon pepper
    1cup shredded mozzarella cheese (4 oz)
    DIRECTIONS
    1.Heat oven to 350°F. Spray 16 (2 3/4x1 1/4-inch) muffin cups with CRISCO® Original No-Stick Cooking Spray.
    2.Separate each can of crescent dough into 8 triangles. Press 1 triangle on bottom and up side of each muffin cup.
    3.In large bowl, beat cream cheese with electric mixer on medium speed until smooth. Add eggs, one at a time, beating well after each addition. Stir in onion, spinach, salt and pepper until well mixed. Fold in cheese. Fill each cup to the top with egg mixture (do not overfill).
    4.Bake 15 to 20 minutes or until knife inserted in center comes out clean and edges of rolls are golden brown. Remove from pan. Serve warm.
     

    Pillsbury Onion-Cheese Custard Tartlets Onion-Cheese Custard Tartlets


    can (8 oz) Pillsbury® refrigerated crescent dinner rolls or 1 can (8 oz) Pillsbury® Crescent Recipe Creations® refrigerated seamless dough sheet
    cup shredded Gruyère cheese (about 1 1/2 oz)
    green onions, sliced (1/4 cup)
    tablespoon diced pimientos
    egg
    tablespoons whipping cream
    DIRECTIONS
    1.Heat oven to 375°F.
    2.If using crescent rolls: Unroll dough into 1 large rectangle on work surface. Press into 12x9-inch rectangle, firmly pressing perforations to seal. If using dough sheet: Unroll dough on work surface. Press into 12x9-inch rectangle.
    3.Cut dough into 12 squares. Gently press squares into 12 ungreased mini muffin cups, shaping edges to form rims 1/4 inch high. Spoon cheese evenly into dough-lined cups. Top each with onions and pimientos. In small bowl, beat egg and whipping cream with wire whisk or fork until blended. Spoon slightly less than 1 tablespoon mixture into each cup.
    4.Bake 15 to 20 minutes or until edges are golden brown and filling is set. Cool 5 minutes. Remove from muffin cups.

    Cheddar-Bacon Wake-Up Casserole- Country Home


    Bow Ties with Chicken and Dried-Tomato Pesto


    This dish is very flexible-stir in any cooked vegetables you might have on hand. Or add fresh broccoli florets or sliced carrots to the cooking water when you add the pasta. We sautéed sliced mushrooms and added with the pesto. Replace the chicken with shrimp or leave out the meat altogether. You can also use warmed broth or white wine instead of the pasta water.

    Start to finish: 30 minutes

    8 oz. bow-tie pasta
    2 cups frozen peas and/or chopped roasted red peppers
    1/2 cup oil-packed dried tomatoes, drained
    1/3 cup olive oil
    1/2 cup slivered almonds
    2 cloves garlic
    1/4 tsp. each salt and black pepper
    1/4 cup freshly grated Parmesan cheese
    2 cups chopped or shredded purchased roasted chicken or cooked chicken
    1/4 cup fresh basil, snipped
    Freshly shredded Parmesan Cheese (optional)

    1. Cook pasta in a large pot of salted water according to package directions, except add peas to pasta water for the last 2 minutes of cooking time, if using. Reserve 1/2 cup pasta water when draining pasta and peas. Place drained pasta and peas back into the pot.

    2. Meanwhile, for dried-tomato pesto, in a food processor or blender, combine the drained dried tomatoes, olive oil, almonds, garlic, salt, and pepper. Cover and process until almost smooth. Add 1/4 cup Parmesan cheese and blend until combined.

    3. To the pasta (and peas if using) in the pan, add reserved 1/2 cup pasta water, dried-tomato pesto, roasted red pepper (if using), and chicken. Toss gently with snipped basil. If desired, serve with additional Parmesan cheese. Makes 6 servings.

    Per serving: 470 cal., 26 g fat (5 g sat. fat), 53 mg chol., 556 mg sodium, 40 g carbo., 5 g fiber, 22 g pro.